Building a Low-Cost Photo Studio – What Size?
How Large Are Your Subjects ?
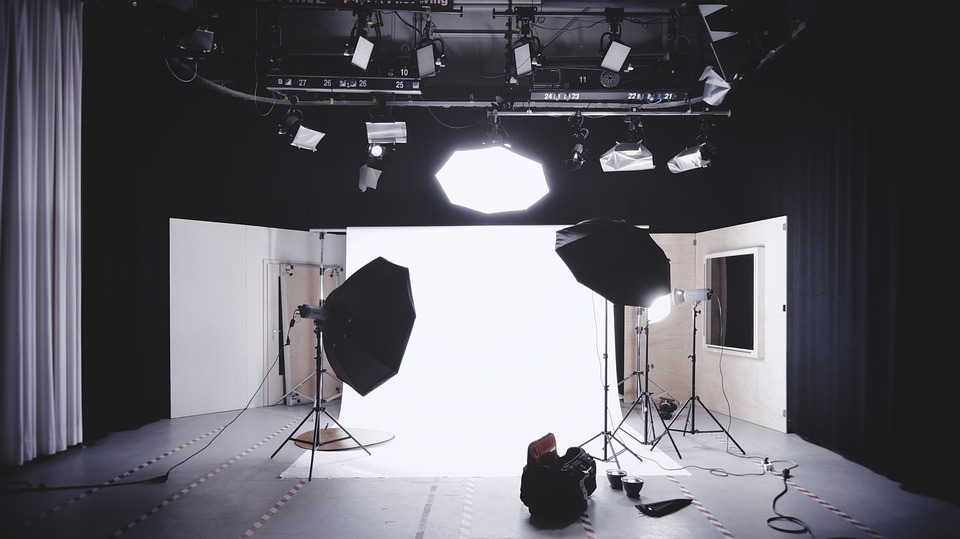
Most of the decisions you will make regarding your studio are based on the size of your objects or people. For example, if you are shooting miniature figurines you do not need very much space. In that instance, the entire studio might fit on your kitchen table. At the other end, if you are shooting custom cars you need a studio that can fit not just the car, but the specialized lights and backdrops necessary for such a large object. Usually the subjects are somewhere in the middle range. As most of our customers sell clothing, accessories, and jewelry, we will assume you are presenting clothing on human models, mannequins, or racks.

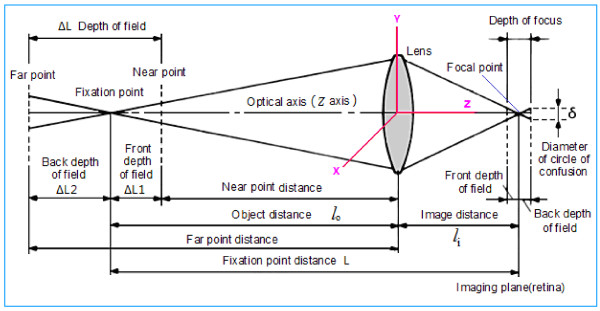
As a photographer, you can choose different lenses, different cameras, and change the settings for a specific shot. The following diagram explains the key variables used in calculating an in-focus image. As the photographer, you can choose to make trade-offs -an important skill that must be developed.
Fortunately, we can be spared the complexity of calculating all of the details. We use a Canon variable zoom lens in our studio. Therefore we can consult the lens test results (before purchasing the lens ideally). The following tests were performed by Bob Atkins photography [http://www.bobatkins.com/photography/eflenses/lens_data.php?ID=141 ] He has saved us the hard work of objectively measuring the quality of the lens at various settings using standard resolution charts.
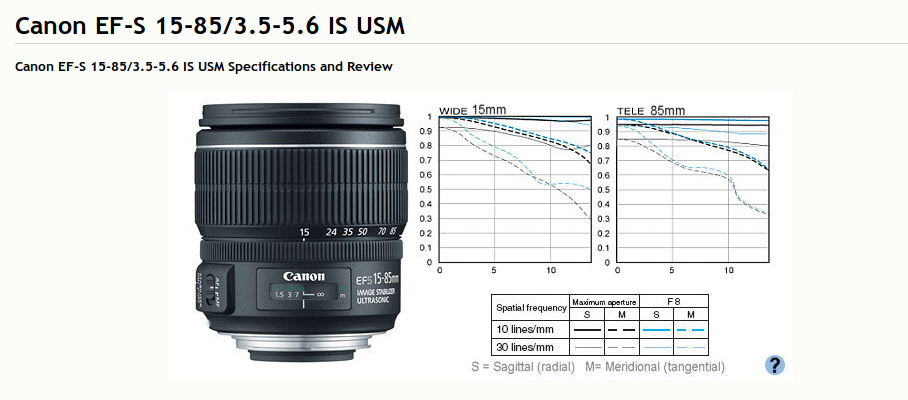
Reading the chart, one can see the quality drop-offs that occur at about 10 feet (on the telephoto 85mm usage). We generally shoot our models at about 8~10 feet for full body views and about 2~3 feet for headshots or other close-ups. For our purposes, we need a studio that is at least 12 feet by about 10 feet in dimension. Although we get by with 9 foot ceilings, 12 feet would be much easier to work in. To keep the numbers simple, our ideal studio size would be 12’x12’x12′.
Same Camera Distance – Different Lenses
Of course, some people will immediately point out the fact that a shorter lens length would allow one to take close shots. As you can see from the following example, a shorter lens can distort the subject. Look carefully at the facial structure of the model – the center of the face is expanded while the longest lens (the distance based on filling the camera frame) preserves her facial proportions. This does not mean a short lens is not useful – in fact most fashion work is done with shorter prime (fixed length, no zoom) lenses, but that you want sufficient space to avoid distortion. This means you have enough room to gain some distance to your subject. Based on our experience, a full sized human should be photographed at a minimum distance of about 8 to 10 feet (about 3 meters) assuming you want the full body in the finished shot.

Using Enough Light For Your Subjects
The human eye readily adapts to less light. Walk into a room at night with little light and after 5 minutes, your eyes have adjusted to the dimness. The lighting, while it may be dim, is sufficient for us to see. As mechanical objects, cameras do not have this ability to adapt. Instead, when the lights are too low, the camera sensors (in a digital camera) introduce noise. Noise comes from the situation where there is insufficient light to fully trigger the digital sensor in the camera. When you look closely at images containing noise – especially in the darker areas of the photo, you will see patterns that look similar to this example: 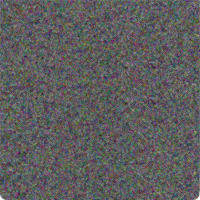 The usual suspect in creating noise is insufficient light. Therefore, your studio must have enough electricity to support multiple lights and the room to use them effectively. We will cover lighting in a separate post but the immediate point is that you need to provide sufficient space for multiple light stands in your studio.
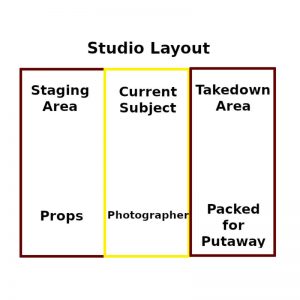
Staging Areas
If our proposed minimum space seems too large, it is because we have discovered that you will want staging areas outside the image range of the camera. We set up a staging area for preparing the next model on one side and a put-away area to the other side. In the staging area, we assemble the mannequin for the next shot. We then move the current model off the primary stage into a takedown area then move the readied model into camera view. Using this approach, two people can quickly get through the scheduled shots without tripping over one another or the equipment.
Conclusions
If you have small objects to photograph, you may be able to get away with using your kitchen table and a lightbox as your studio. We found that shooting full-size humans takes about a 12′ by 12′ studio so you have sufficient room to work. Ideally, you would have 12′ ceilings but your choices may be limited. If you must work with less space, keep the distance required for the photographer to avoid distortion in your photos. To keep costs down, we will cover in our next post, how to build your studio so it can be easily set-up and taken down. With our approach, you can keep the space free for other purposes since you usually take photos in blocks of time surrounding a new product introduction or the updating of existing image stocks.